Get Your ALL ACCESS Shop Pass here →


Seed Germination Experiment
Watching seeds grow is an amazing science project for kids! Our seed germination experiment allows kids to see up close to how a seed grows! Learn about the steps of seed germination, and investigate what conditions a seed needs to germinate. Easy science experiments are great for kids of all ages!
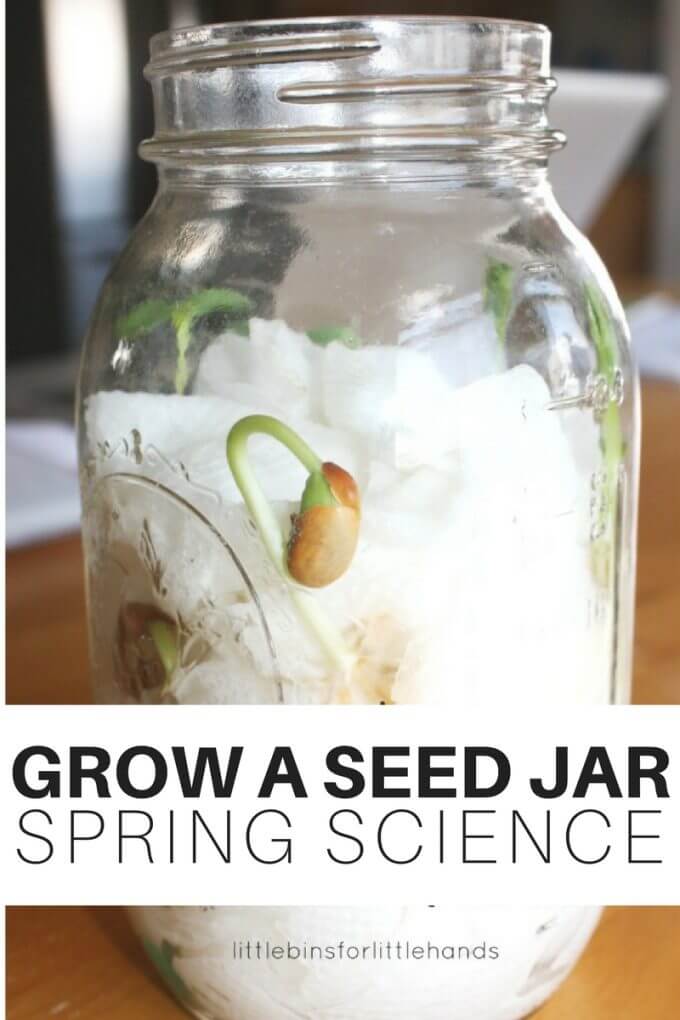
Seed Germination In A Jar
Also check out our list of other fun science experiments you can in do a jar! >>> Science in a Jar
- Paper Towels or cotton wool
- Seeds (see our suggestions above)
H ow To Set Up Your Seed Experiment
STEP 1: Fill the jar with paper towels. Kids can fold them and push them down into the jar. This is also great work for little hands.
STEP 2: Gently water your seed jar to wet the paper towels. DO NOT FLOOD IT!
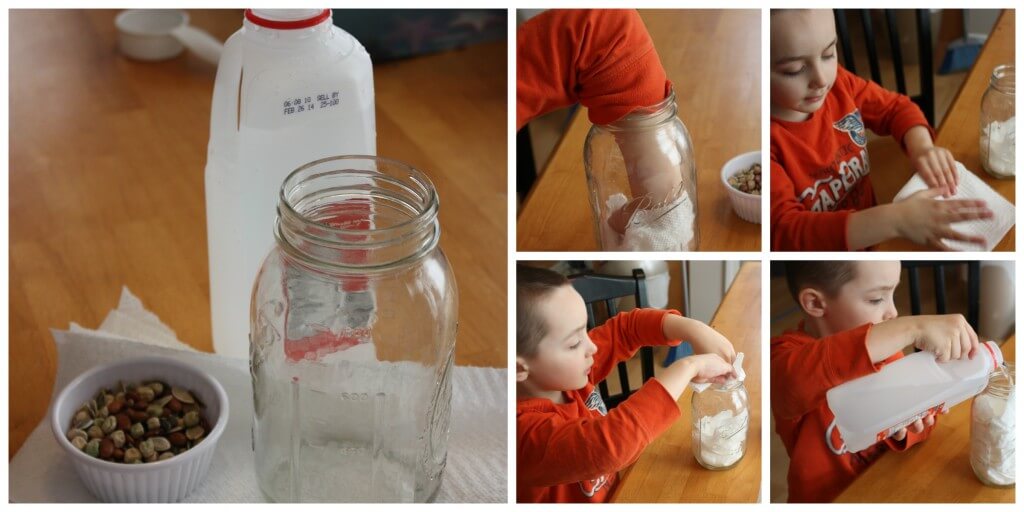
STEP 3: Carefully push seeds down into the paper towels around the edge of the jar so they can still be seen. Make sure they are firmly held in place.
TIP: One easy way to get your seeds to germinate faster is to presoak them in a shallow container of warm water for up to 24 hours. That will soften the hard outer shell of the seed. Don’t soak for longer as they may go moldy!
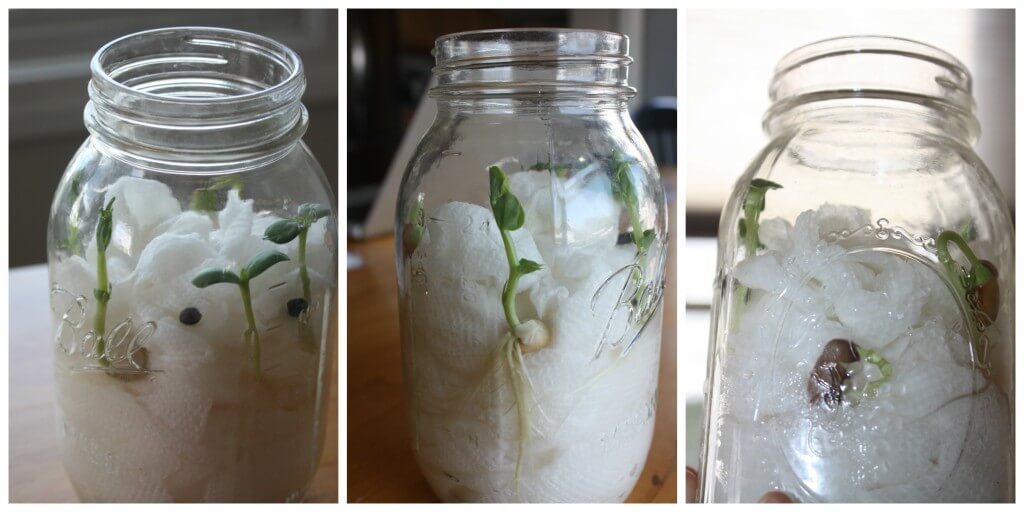
Our mason jar below includes sunflower, pea, and green bean seeds!
STEP 4: Put your jar in a safe place, and check in regularly to observe any changes.
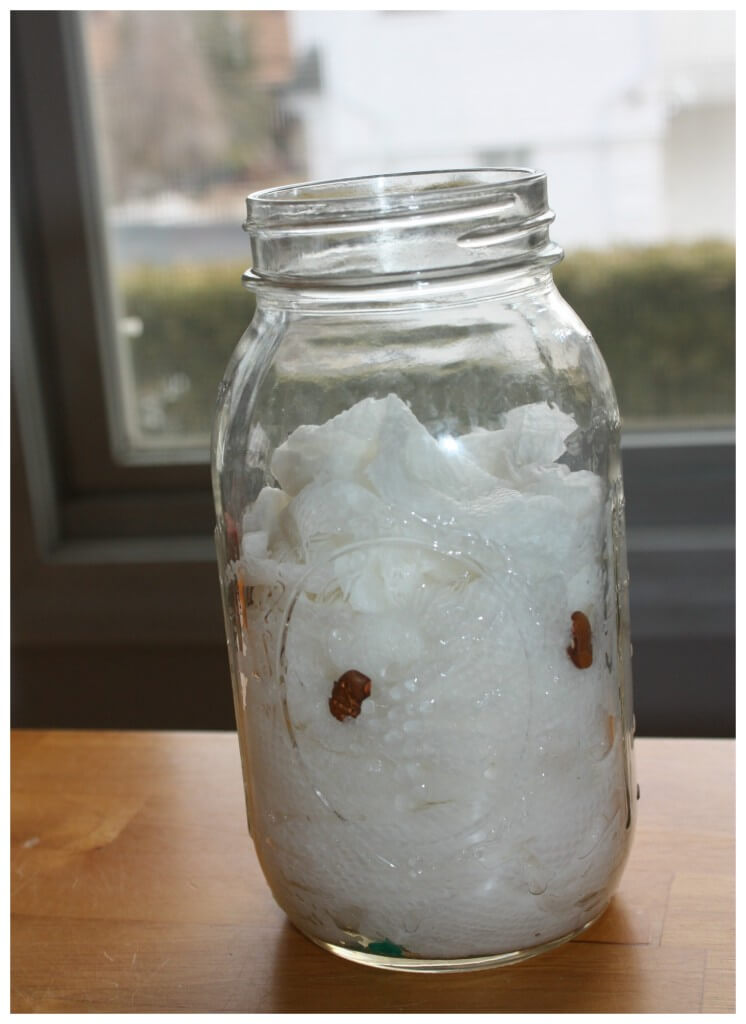
It all starts with a single seed!
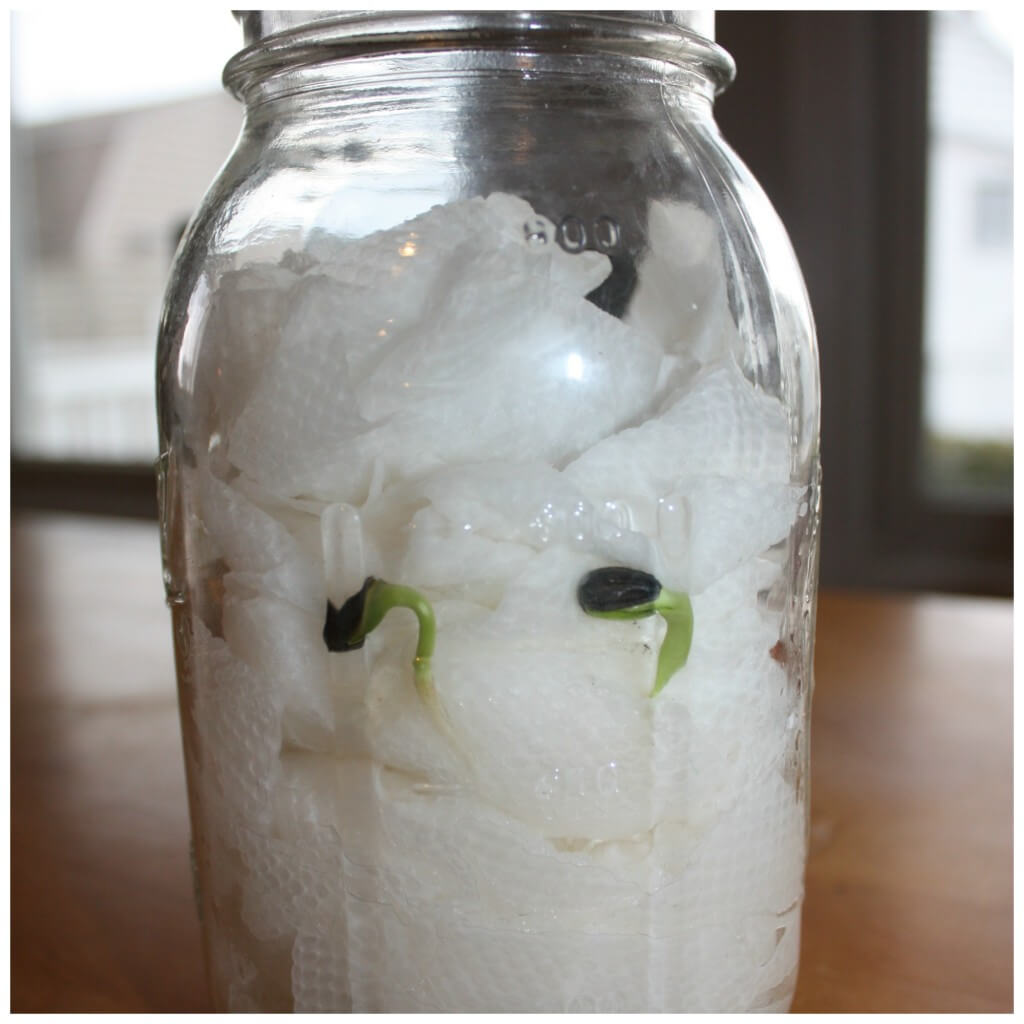
Watching how a seed grows and using a mason jar gives you a front-row seat for observing it all! Sprouting seeds is perfect for a spring STEM activity !
Another fun way to sprout seeds, especially at the end of winter, is with a mini greenhouse made from plastic bottles.
What Is Seed Germination?
First, let’s learn a bit more about germination. Seeds grow into a new plant through a process called germination. Germination is the sprouting of the seed or the very beginning of plant growth.
Availability of water, cold temperatures or warm temperatures, oxygen, and light exposure may all be a factor in starting germination or keeping the seed dormant. What conditions are needed for germination will vary between plants, as each has adapted to the biome in which they live.
Stages of Seed Germination
First, the seed absorbs water. This causes the seed to swell and the outer coating to break. Then the seed starts to break down some of the food that is stored in it. Most seeds will need oxygen in the air in the soil for this to happen.
Eventually, when the seed has grown leaves it can make its own oxygen and absorb carbon dioxide through photosynthesis .
Once the seed coat breaks open, the first root grows, called the radicle. In almost all plants, the root comes before the shoot.
Once the root starts to grow, it can now absorb water and nutrients from the soil, instead of getting it from the seed coat.
After the root, the plant’s stem starts to grow. When it reaches above the ground, the leaves begin to grow. This is when the plant no longer has to rely on the stored starch (cotyledon) that comes from the seed.
Turn It Into A Science Project
This simple seed experiment is a great introduction for preschoolers to growing plants , and a fun plant experiment for older kids to investigate what conditions seeds need to germinate.
Older kids can use a science experiment worksheet to write down their observations about how the seeds are growing. While young kids can draw or observe the changes!
There are so many fun questions you can ask…
- Do seeds need light to germinate?
- Does the amount of water affect seed germination?
- Do different types of seeds germinate under the same conditions?
- Does salt water affect seed germination?
Explore how fast different seeds germinate by comparing different kinds of seeds under the same conditions. We tried sunflower seeds, peas, and beans in our seed jar.
Or keep the type of seed the same and set up two mason jars to explore whether seeds need light to germinate. Place one jar where it will get natural light and one in a dark cupboard.
Another idea is to investigate whether seeds need water to germinate and how much. Set up three jars, and measure out how much water goes into each so that one is fully wet, half wet and one has no water.
Learn more about the scientific method for kids and using variables in science experiments!
Free Printable Bean Life Cycle Worksheets
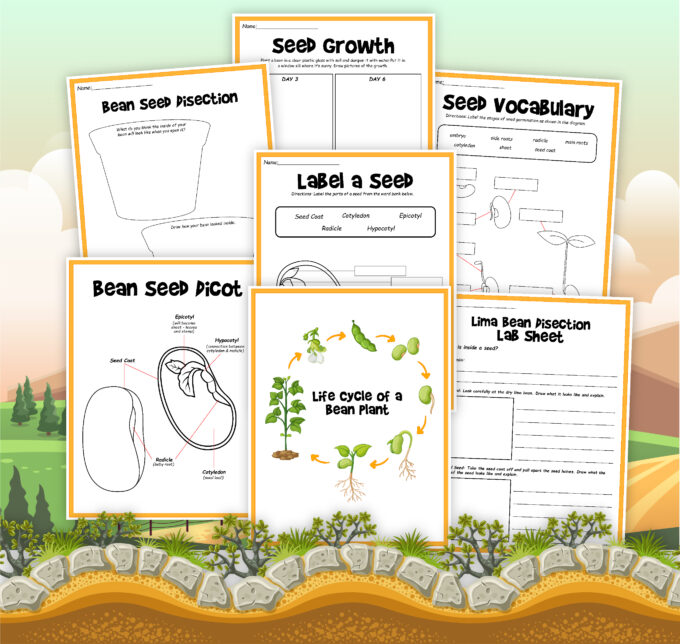
Extend the learning of this hands-on project with this free bean life cycle mini pack !
How To Observe Seed Growth
Get your magnifying glass out and check out all the angles of the seeds. Can you find the different stages of seed germination described earlier?
What do you see in your seed jar?
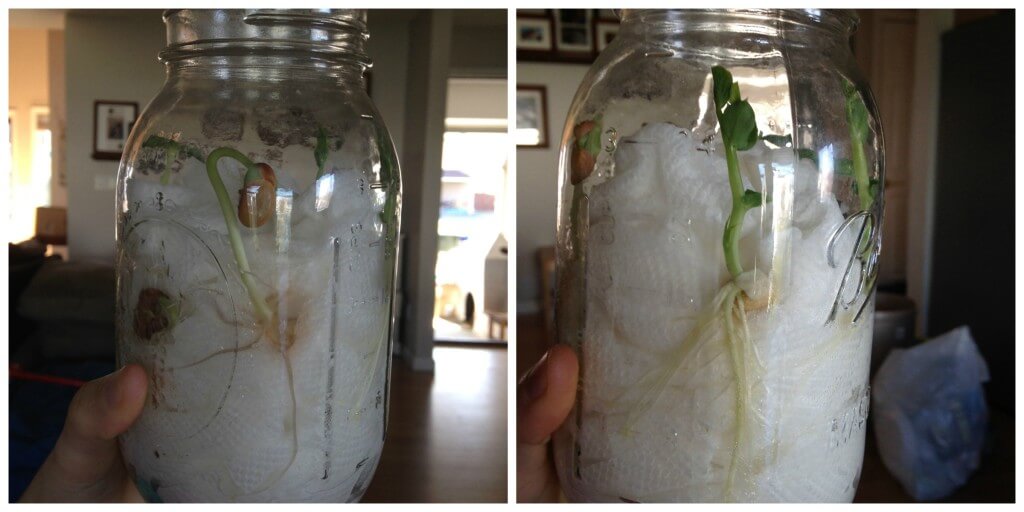
- You are looking for a root to pop out of the side.
- Next, you are looking for a root to push down into the soil.
- Then, you are looking for root hairs.
- Next, look for the seed to push up while the root hairs push down.
- Lastly, you are looking for the shoots to come up!
The mason jar gives a stunning view of this seed experiment! My son loved being able to see the changes so easily.
More Fun Plant Activities For Kids
Looking for more plant lesson plans? Here are few suggestions for fun plant activities that would be perfect for preschoolers and elementary kids.
Learn about the apple life cycle with these fun printable activity sheets!
Use art and craft supplies you have on hand to create your own parts of a plant craft .
Learn the parts of a leaf with our printable coloring page.
Use a few simple supplies you have on hand to grow these cute grass heads in a cup .
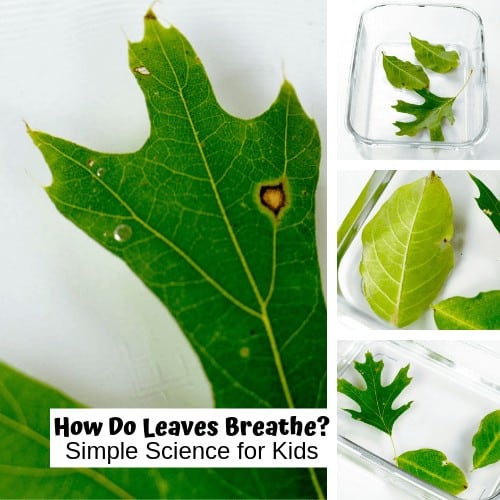
Grab some leaves and find out how plants breath with this simple plant experiment.
Learn about how water moves through the veins in a leaf.
Explore how light, water, and temperature affect plants with this plant growth experiment .
Watching flowers grow is an amazing science lesson for kids of all ages. Find out what are easy flowers to grow!
Printable Spring Activities Pack
If you’re looking to grab all of the printables in one convenient place plus exclusives with a spring theme, our 300+ page Spring STEM Project Pack is what you need!
Weather, geology, plants, life cycles, and more!
58 Comments
This is what we should have done – instead we tried plastic bags to grow the seeds in, and they got foggy with condensation so it was hard to see the root! Aw, well. Lesson learned. Next time – grow them in a jar! lol!
We just started our beans in a jar last week. Looking forward to seeing what happens this week.
We’ve just done the same 🙂 Put the beans in the jar instead plastic bags 🙂 Mr Frog is so excited observing the bean growing!
Wonderful learning activity! Thanks for linking up at the Thoughtful Spot Weekly Blog Hop!
My girlie is very curious about planting and asks tons of questions about the seeds and what happens with them in the soil. This is a great way to show her clearly enough the whole process of the seed’s growing. Thank you for this idea!
What kind of pea seeds did you use?
Good question. I don’t remember the band or name but it was a common package from the store.
This looks like so much fun! Can’t wait to try with my 4 and 2 year old son and daughter. We’re always looking for affordable, educational and fun activities. This is perfect. Happy to have stumbled onto this site!
Do you cover the jar? Do they need to be near a sunny window? Are you supposed to water them? Thanks!
Wonderful! Thank you!
Hi! I did not cover the jar. They were on a table in front of window that did get sunlight at some point during the day. We did not water daily. I added a tiny bit here and there but not much at all. We actually went away for a week and came back to them being so tall which you can see in the picture above. Thats a week with no water what so ever!
What kind of beans did you use? Pinto? I’m wanting to start this activity here soon with my little in-home daycare. 🙂
We used green beans, sunflowers, and green peas!
Just double checking no soil, just paper towels. This is our spring break project. I can’t wait.
Right no soil!
hello! I’m going to try this with my kindergarten class. Did you use dried green beans infrom a bag (like at the supermarket)? Or fresh ones?
Where did you get your seeds? Did you buy them fresh and pick the seed out off the pods or take it out of the shell? I’m interested in doing this but I don’t want to buy the wrong ones.
Simple seed packets from the grocery store!
that was so cool
What a great learning activity. I am featuring this with a link on my blog.
We are getting ready to start this project today with our preschool class. One thing i have not been able to find is, how much water/how wet do the paper towels need to be?’
super cool!!!
- Pingback: Alternative Slime Recipes Borax, Laundry Detergent, and Fiber
- Pingback: 10 Fun Spring Activities for Kids - The Exhausted Mom
U just use dried peas you get in a box steep them over night then plant them absolutely excellent outcome 4 kids and grown ups alike lol
Interesting! Share a picture!
- Pingback: Spring Science Ideas with Family Fun Friday!
you teach me something thanks very much.
- Pingback: 12 Sensational Spring Activities for Kids! – The Homeschool Resource Room
- Pingback: Super Fun Spring Activities Your Kids Will Go Crazy Over!
- Pingback: Celery Osmosis Science Experiment and Demonstration for Kids Biology
- Pingback: Preschool Earth Day Activities Science and Sensory Play
- Pingback: Celebrate the Season with These 5 Easy Spring Crafts - Learning Liftoff
- Pingback: 20 Engaging STEM Activities for Kids to Do This Spring
- Pingback: Hydroponics For Kids- What, Why, And How | Family Focus Blog
- Pingback: 10 + Super Fun Earth Day Crafts - Mamma Mode
- Pingback: Earth Day Activities Earth Day STEM for Kids
- Pingback: 50+ STEM Activities, Books, Games, & More for Kids | Faithful Farmwife
- Pingback: 25 AWESOME EARTH DAY ACTIVITIES FOR KIDS
- Pingback: 21 Best Science Fair Projects To Try - Fun with Mama
- Pingback: 21 Best Science Fair Projects - Fun with Mama
- Pingback: Earth Day STEM Activities and Challenges for Kids
- Pingback: 5 Fun DIY Recycled Crafts - Learning Liftoff
- Pingback: Spring Flowers Books & Activities for Preschoolers
besides seed jar science is there anything else that kids can do?
What do you mean? Feel free to email me [email protected]
- Pingback: 21 Experiments for Summer Science Learning Activities for Kids | MilKids Education Consulting
I cant wait to try this out with the 4 year old children at the our Early Learning Centres I am grateful to have found this page. Thank you so much.
At any point do you add soil to the jar or transfer the plant out so it can grow bigger? If transferring, what’s the best way to move them out of the jar and into a pot? What stage of growth should they be at before doing so? Does this method work for any type of seeds? This is perfect for the plant project I want to start with my in-home daycare but I wanted to use seeds from foods they eat and can replant as a way of incorporating recycling into the other lessons learned but I’m new to all of this including being a first time mom/in-home daycare owner and have lots of questions lol! Thank you in advance for your time, patients, and wisdom! 🙂
You could potentially transfer it! We did not. You wouldn’t add soil to the jar though. Makes a great experiment to see if it takes outside or in a pot!
- Pingback: 10 Fall Toddler Activities - A Blossoming Life
- Pingback: 25 Spring Science Experiments for Kids
- Pingback: Homeschooldaze: “Seed Jar Science Experiment for Spring STEM Activities with Kids” – Darlene's Homeschool Daze
- Pingback: Nature Play Activities and Environments for Children
- Pingback: Spring has Sprung! | Science in Storytime
- Pingback: Ultimate Boredom Buster: 101 Things to Do When Kids Are Bored
- Pingback: Ideas for Home Learning #1 | The Outdoor Classroom @ Rhyl Primary School
Since we are getting to spring, a seed germination jar is a perfect activity. Thanks
Comments are closed.

Subscribe to receive a free 5-Day STEM Challenge Guide
~ projects to try now ~.

How Wee Learn
Out of the box learning ideas, playful art, exploring nature, and simple living - that is How We Learn!
Seed Germination Experiment – The Results!
May 27, 2024 by Sarah
Have you ever used the mason jar method for a seed germination experiment?! It is so neat to watch a seed sprout and grow, and to see the root structure take shape. It also makes for an awesome seed germination experiment, comparing roots and sprouts and how quickly each grows!
In this blog post, I’ll share with you exactly how we set up our seed germination experiment, a Free Printable Seed Growth Tracker, AND the results with the best seeds to germinate with kids!

Seeds and Plants Family Unit Study
This seed germination experiment is one of the hands-on activities from my Seeds and Plants Family Unit Study .
If you’re new here, let me explain. This unit study, like all of our ever-growing library of unit studies, takes one big topic—Seeds and Plants—and breaks it down into ten manageable, bite-sized learning topics. This format gives you the freedom to dive into learning at a pace that works for your family.
Each of the ten topics included with a unit study contains everything you need for that topic, including:
- a curated YouTube video,
- suggested information to read,
- a “what’s happening” section,
- an interesting fact,
- a discussion question,
- literacy and math extension questions,
- and an ultimate-can’t-be-beat hands-on activity!
Perhaps you do one topic per day, perhaps one per week. Whatever suits your fancy! You can learn about seeds and plants and explore one of the 10 topics from start to finish in about 1-2 hours.
Printable Seed Growth Tracker
Within the Seeds and Plants Family Unit Study, your little ones will observe and document how their seeds grow with this Printable Seed Growth Tracker . You can grab it for FREE right here:
Seed Germination Experiment: The Set-Up
For this experiment, we’re going to germinate our seeds using the ‘mason jar and paper towel’ method. With this method, kids can see the seed sprout and the root structure form, giving them the real-life learning they need to understand what’s happening beneath the soil!
For your seed germination experiment, you will need:
- a glass jar
- paper towels
Instructions
First, we pushed sheets of paper towels, one at a time, into the glass jar. Once it was full, we added some water to wet it (dumping out any excess). Wetting the paper towel made room for a few more pieces to be pushed into the jar and then wet again (and again, dumping out any excess water). We made sure the paper towel was rather packed so the seeds would stay nicely in place next to the glass.

Next, we picked four seeds to germinate: beans, snap peas, cucumber, and swiss chard. We pushed each seed down the side of the glass jar and supported them with the wet paper towel when pulling our fingers out.
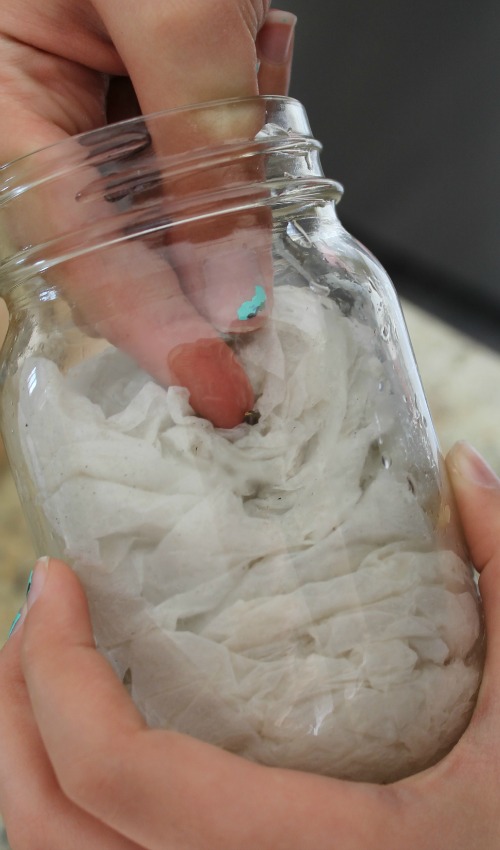
We added all four of our seeds to one mason jar, but you could also set up separate mason jars for each of your different types of seeds.
Finally, I labeled each seed so we could make observations and comparisons.

Seed Germination Experiment: The Results!
One of the reasons I love doing seed germination with kids is how quickly the seeds start to grow. For this seed growth experiment, our seeds started to root on Day 2! By the next day, there were sprouts, too. And by Day 5, three of our four seeds were growing strong!
These are the seeds that we chose to germinate:
- Swiss Chard
So, how did our four seeds compare?
Here is a little run down of our results, though yours may, of course, be slightly different.
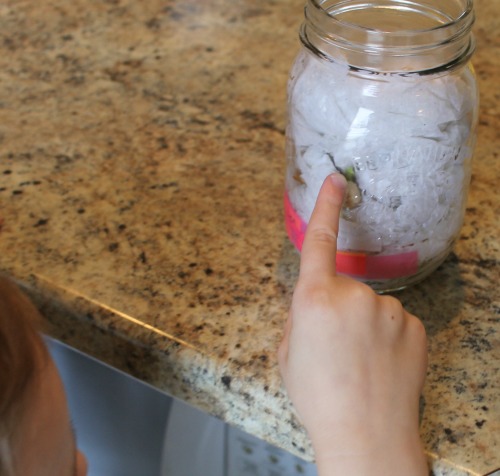
Day 1 – Despite checking a gazillion times, nothing happened.
Day 2 – Snap Pea rooted.
Day 3 – Snap Pea started to sprout, and Bean started to root.
Day 4 – Bean started to sprout, and Swiss Chard started to root (though it was tricky to see!).
Day 5 – Snap Pea , Bean , and Swiss Chard were all rooted and sprouting.
Day 6 – Bean overtook Snap Pea for the tallest and strongest plant.
Day 7 – All growing strong! (Except for the Cucumber …)
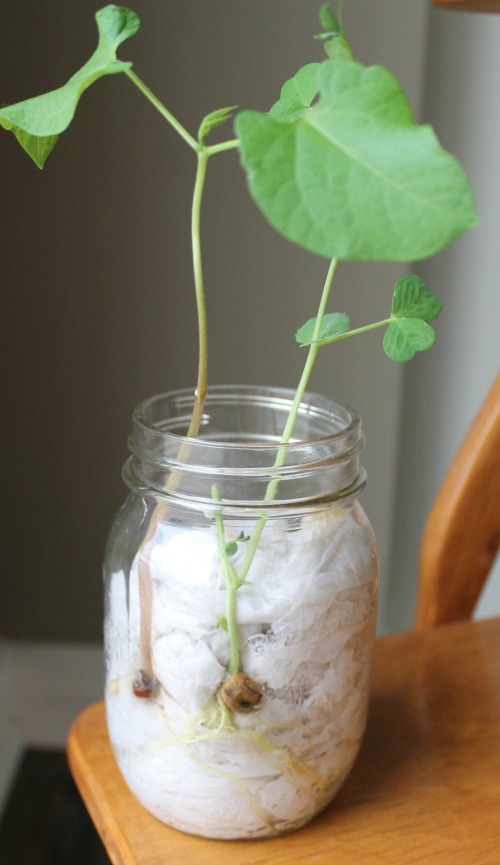
We had the best success with snap pea and bean seeds. Both grew fairly similarly, easily, and strongly. The roots to the snap pea were a bit easier to see, but the bean seed looks really neat as it sprouts!
So, What’s the Best Seed to Germinate with Kids?
So, if I were forced to choose between a bean or a snap pea seed to germinate with my little ones, I would choose—after a long and restless night’s sleep debating the choice— Snap Pea!
The root system on a snap pea is really fascinating—and that is why I do seed germination for kids in clear jars with paper towels : so they can see the root system.
Truthfully, we didn’t do too many activities while we were observing our seeds sprouting. It was mostly casual conversations. But conversations themselves can be one of the most powerful learning tools of all!
We made predictions and comparisons, developed new vocabulary, and—most importantly—marveled at how miraculous the whole process is.
This is one of the simplest ways to introduce little ones to seed germination. You can keep it simple, or turn it into quite an all-encompassing endeavor! Whatever floats your boat. Our boats are currently floated in a shallow stream… some days, a puddle…

More Seed Activities for Kids
If you’re looking for more seed activities, be sure to check out these 35 Seed Activities for Kids . And if you’re feeling crafty, I have tons of Seed Art Ideas for Kids as well.
And if you would like everything planned for you, I encourage you to check out my Seeds and Plants Family Unit Study!
https://shop.howweelearn.com/products/family-unit-study-seeds-and-plants
I hope you find these seed activities helpful for you and yours!
Thank you for reading, my friend,
"Mom, you're the BEST!"
Get playful activities emailed each week. Subscribing is FREE!
April 4, 2014 at 3:32 pm
The fail-safe ones are my favorite! lol! I love that this is just a casual experiment that still puts the roots (pun not intended) of science in their minds! 🙂
February 11, 2016 at 10:52 pm
Really helpful for my sons science project. I appreciate you sharing a lot! Thank you. We aren’t finished with ours however it’s a little more complicated. But wanted to say again appreciate your share! Great job!
February 15, 2019 at 4:44 pm
We always had the best success with nasturtium seeds.
February 19, 2019 at 9:12 pm
Oh interesting Theresa! I have never tried sprouting these seeds. I will have to give it a go!
March 5, 2021 at 2:00 pm
Hi, Did you just fill the jar up with wet paper towels? really wet? or misted wet? I’m trying to figure out how the seeds sit against the side of the jar. thanks
March 8, 2021 at 10:51 am
Hi Christina, Great question! The trick is to really fill the jar all the way with paper towels. Rip them off one by one and shove them in the jar. Then add lots of water to wet them down and continue to fill the jar again with the paper towel, wetting them down and repeating until the jar is totally full. Then dump out the excess water and press the seeds in. We then water the jar every two or so days and dump out the excess water. Hope this helps! I actually have a video coming out with more details next week. I will be sure to link it here!
April 11, 2022 at 9:15 pm
Where can we find the video? Love this idea!
April 17, 2022 at 8:28 pm
Thank you so much! You can check out the video in this blog post: https://www.howweelearn.com/two-spring-learning-crafts-we-love/
April 11, 2021 at 10:35 pm
Where did you get your seeds? Is it something I can just get at any store? Thank you. I nanny and always looking for learning amd fun things to do with her.
April 12, 2021 at 7:23 pm
Hi Faith! Yes, any store at all. The dollarstore carries seeds as well. I hope you have fun!
April 11, 2021 at 10:38 pm
Also, where in the jar did you put the seeds? On the sides? Do I put the different types of seeds in different jars?
April 12, 2021 at 7:28 pm
Yes! Once the paper towels are stuffed in the jar you can just slide the seeds in between the jar and the paper towels. You can put them in different jars, or pop them all in the same jar. Anything goes!
April 16, 2022 at 5:56 pm
Radish seeds sprout really fast as well. I’m a teacher and I use a plastic glove ( the large ones that cafeteria workers use) and instead of paper towels I use cotton balls. One cotton ball and one seed for each finger. Dip the cotton ball in water and wring out the water so that its damp and not dripping. Hope this helps anyone and thanks for the seed ideas!
April 17, 2022 at 8:23 pm
Great tips, Lindzi! Thank you!
February 6, 2022 at 10:46 pm
Hi Sarah, I have done this with many students. I had over 1200 students come to our conservation days and we showed them how to do this. With so many kids buying packaged seed was out of the question, so I just bought a bag of beans from the grocery store and started the process the night before by soaking them overnight. Then the bean seed germinated faster. Also corn seed can be used. Neither need to be soaked but it does speed up the process.
Just found your site. I was looking for fun easy experiments for my grandson who is 3 years old. I taught science for 35 years but, have been away from it and needed some inspiration, you know that oh yea, that would be a great one for him to do. Thank you.
February 9, 2022 at 7:56 pm
What a great tip, Brenda! Thank you so much.
For every step of your journey

Shop Resources
Privacy Overview
Free Sample
Stars & constellations family unit study.
Wondering if Unit Studies are right for you? Get a FREE sample! It will be delivered to your inbox instantly, then you will be redirected to my shop where you can take a peek at the rest of the available units and bundles.
Each week, I send an email to my lovely subscribers with fun activities for children. You’ll also be the first to know when I’m offering an incredible deal. Unsubscribe at any time!
Free Printable
Let's take the mystery out of learning to read..
Check your inbox! Your free printable will be emailed to you immediately.
- Ask A Question
- Teacher's Toolbox
- Listen and Watch
- Activities Overview
- Biology Bits
- Bird Finder
- Coloring Pages
- Experiments and Activities
- Games and Simulations
- Virtual Reality (VR)
A classic seed experiment
Seed germination activities are a long-time favorite of educators. One of the classic seed experiments uses a resealable plastic bag, a paper towel or napkin, seeds and water. This is a low-cost, effective tool for teaching about seeds, germination, gravitropism and energy. It also provides a perfect environment for introducing the fundamentals of the scientific method .
A twist on an old favorite
Dr. Biology’s Virtual Pocket Seed Experiment adds a twist to this classic experiment that fits into today's technology. It allows educators to introduce students to all the concepts of the original with some added features and benefits.
- The virtual version is a collection of real data that students can use to chart the results of different seed treatments.
- Each treatment is also animated so 10 days can be viewed in a matter of seconds.
- A companion Excel spreadsheet introduces students to 21st century skills as well as graphing and charting.
Virtual Pocket Seed Experiment
The best part of the Virtual Pocket Seed Experiment is it is flexible. It allows teachers to introduce as much of the virtual data as desired.
In some cases it can serve as a backup for the real-world experiment. It can be used in its fully virtual form to compress the time it takes to run the hands-on version.
The animations and companion story also serve as introductory materials to capture student imagination and interest. The virtual version is based on a real world experiment adding to its authenticity. Students can then run their own experiments and compare their results to the virtual version.
How to use the Virtual Pocket Seed Experiment
The Experiment Packet PDF contains all the educator needs for either the hands-on or virtual experiment. It also provides detailed instructions including illustrations, a sample lesson plan, handouts and materials for students to use for either experiment. It is worth downloading the reviewing the packet. There are several ways to introduce the experiment to students depending on the needs of the educator. Below are some suggestions based on instructor feedback.
- Many teachers introduce students to seeds, their anatomy and seed germination using the companion, Time Traveling Plants , story.
- Before using the virtual experiment it is best to review Experiment Overview and Data Card Help sections.
- Younger learners run the experiment and carry out the analysis.
- Older learners begin to use the companion Excel file.
- For some high school teachers the experiment is used as a quick 30-50 minute refresher for students to get them thinking critically and using the scientific method.
Arizona Science Standards
Strand One: Inquiry process
Concept 1: Observations, Questions, and Hypotheses
- PO 1. (5) Formulate a relevant question through observations that can be tested by an investigation.
- PO 1. (7) Formulate questions based on observations that lead to the development of a hypothesis.
- PO 2. (2) Predict the results of an investigation.
Concept 2: Scientific Testing (Investigating and Modeling)
- PO 1. (7) Demonstrate safe behavior and appropriate procedures in all science inquiry.
- PO 2. (4) Plan a simple investigation that identifies the variables to be controlled.
- PO 3. (4) Conduct controlled investigations in life, physical, and Earth and space sciences.
- PO 4. (5) Measure using appropriate tools (e.g., ruler, scale, balance) and units of measure.
- PO 5. (5) Record data in an organized and appropriate format.
Concept 3: Analysis and Conclusions
- PO 1. (7) Analyze data obtained in a scientific investigation to identify trends.
- PO 2. (7) Form a logical argument about a correlation between variables or sequence of events.
- PO 3. (6) Evaluate the observations and data reported by others.
Strand 4: Life Science
Concept 1: Structure and Function in Living Systems
- PO 1. (3) Describe the function of the following plant structures: roots, stems, leaves, flowers.
Concept 2: Life Cycles
- PO 2. (3) Explain how growth, death, and decay are part of the plant life cycle.
Concept 3: Organisms and Environments
- PO 5. (3) Describe how environmental factors in the ecosystem may affect a member organism's ability to grow, reproduce, and thrive.
Read more about: Dr. Biology's Virtual Pocket Seed Experiment
- Data Card Help
- For Teachers
- Virtual Seed Experiment
- Experiment Overview
- Data Card Sets
Bibliographic details:
- Article: For Teachers
- Author(s): Dr. Biology
- Publisher: Arizona State University School of Life Sciences Ask A Biologist
- Site name: ASU - Ask A Biologist
- Date published: 29 Dec, 2016
- Date accessed:
Dr. Biology. (Thu, 12/29/2016 - 13:53). For Teachers. ASU - Ask A Biologist. Retrieved from https://askabiologist.asu.edu/experiments/vpocketseeds_teachers
Chicago Manual of Style
Mla 2017 style.

On screen measuring tool speeds up data collection from any zoom view.
Dr. Biology's Virtual Pocket Seed Experiment
Be part of ask a biologist.
By volunteering, or simply sending us feedback on the site. Scientists, teachers, writers, illustrators, and translators are all important to the program. If you are interested in helping with the website we have a Volunteers page to get the process started.
Seed Germination Lab Work (student)
Seeds are plants' way of reproducing. Each seed carries a plant embryo, wrapped in a casing or coat with its own food supply. Life functions in the seed are almost completely shut down until the time is right to start growing. But how does a seed know when the time is right? For you to answer this question, you must test the effects of different conditions on seed germination. One way is to germinate seeds in Petri dishes under very specific and controlled conditions. In this activity, you will investigate the effects of temperature and water.
A. Getting a Baseline: Petri Dish Preparation
The instructions below will help you prepare Petri dishes of seeds.You want lots of dishes so you can do multiple experiments, run each experiment more than once, and look for the natural variation in the number of seeds that germinate. Gather all the necessary materials. The number of Petri dishes you want to prepare will depend on the availability of materials, the time given for dish preparation, and the requirements of your experiment. In general, however, the more dishes you have, the better your experiments will be.
- Petri dishes
- Paper towels
- Wash your hands carefully to reduce any contamination.
- Cut the paper towels into round circles that will fit inside the bottom of the Petri dishes.
- Moisten the circular pieces of paper towel with as much water as they can absorb.
- Wipe off excess water droplets.
- Place one paper round into the bottom of each Petri dish.
- Using tweezers, count exactly 20 seeds onto a paper towel. Handle the seeds very gently.
- Have a partner recount the seeds to make sure there are 20, as the seeds are very small.
- Using tweezers, very gently place the 20 seeds into a Petri dish.
- Place the covers securely on the Petri dishes. (An improperly secured cover will let air into a Petri dish and, therefore, change the growing conditions.)
- Using the identical procedure, count and place 20 seeds into each of the remaining Petri dishes.
- Store the Petri dishes where they will not be disturbed for 24 to 48 hours. Keep them at room temperature (20–23 deg.C), away from heating radiators and out of direct sunlight.
B. TESTING TEMPERATURE CONDITIONS
Making a hot temperature gradient.
- Alfalfa seeds
- Water droppers
- Distilled water
- Hot surface area (prepared by your teacher)
You have exposed seeds to many different temperature conditions. By stacking your Petri dishes on a hot surface, you have created a hot temperature gradient. The Petri dish on the bottom of the stack is very hot, the next dish up is hot, but not as hot as the bottom dish, and so on. The temperature continues to drop as you move up the stack, with the top dish in the stack being the most cool.
C. TESTING WATER CONDITIONS
Making a Moisture Gradient
- Prepare Petri dishes of 20 seeds each as described earlier.
- Line up a row of 10 Petri dishes with seeds.
- Carefully label the dishes so you know which dishes belong to your team. If you have more than one row of 10 dishes, label the rows so you can tell them apart.
- Label the first Petri dish in each row with a 0, the second dish with a 5, the third dish with a 10, and so on by 5s. When you are done, you should have dishes 0, 5, 10, 15, 20, 25, 30, 35, 40, and 45.
- Add drops of water to each dish according to the label on the dish. For example, in the dish labeled 0, do not add any water; in the dish labeled 5, add 5 drops of water; in the dish labeled 10, add 10 drops of water; and so on. Replace the lid on each dish.
- Place the dishes in a location where they will not be disturbed.
- Let the Petri dishes of seeds sit for 24 to 48 hours (1 to 2 days).
- Record your exact procedures and your predictions for the experiment in your GL Journal.
What Have You Done?
You have exposed seeds to many different water conditions. By adding a different amount of water to each dish, you can test how much water seeds need to germinate. If water does not affect breaking dormancy, then the same number of seeds should break dormancy under all water conditions. If water does affect breaking dormancy, then a different number of seeds should break dormancy under different water conditions.

IMAGES
COMMENTS
Mar 16, 2023 · Watching seeds grow is an amazing science project for kids! Our seed germination experiment allows kids to see up close to how a seed grows! Learn about the steps of seed germination, and investigate what conditions a seed needs to germinate. Easy science experiments are great for kids of all ages!
May 27, 2024 · This seed germination experiment is one of the hands-on activities from my Seeds and Plants Family Unit Study. If you’re new here, let me explain. This unit study, like all of our ever-growing library of unit studies, takes one big topic—Seeds and Plants—and breaks it down into ten manageable, bite-sized learning topics.
1. Select the types of seed(s) you will be using for the experiment. 2. For each seed/seed type, record the weight, size (diameter or other dimensions if not round, such as corn or carrot); this will be difficult for very small seeds, such as flax, carrots, chia, et al. Record the recommended planting depth. 3.
germinate at once, they can easily all be wiped out, either eaten or destroyed by unfavorable conditions. Some seeds germinate in the cooler temperatures of Spring, others in warmer temperatures of Summer. Some seeds are more likely to germinate in the light while others prefer the dark. The first thing to happen is the seed re-hydrates by
This seed germinator makes it easy to design and perform experiments to determine the materials and conditions seeds need in order to germinate and grow. The effects of temperature, light levels, and water conditions (such as pH or salinity), as well as the presence or absence of various nutrients are all factors you can investigate.
Dec 29, 2016 · A classic seed experiment. Seed germination activities are a long-time favorite of educators. One of the classic seed experiments uses a resealable plastic bag, a paper towel or napkin, seeds and water. This is a low-cost, effective tool for teaching about seeds, germination, gravitropism and energy.
What do plants need to grow? In this experiment, you’ll explore one of the most important factors affecting seed germination by finding out whether the amount of water a seed receives changes how quickly it germinates. A seed contains the beginnings of a new baby plant. To grow, this plant needs water.
In this experiment, you are investigating whether or not temperature affects seed dormancy and germination. The idea is to expose seeds to many different temperature conditions and then measure the number of seeds breaking dormancy at each temperature.
Oct 9, 2023 · Plant Seeds & Watch Them Grow. Learn about seed germination with this fun science experiment for kids. Plant some seeds and follow the growth of the seedlings as they sprout from the soil while making sure to take proper care of them with just the right amount of light, heat and water.
Try sprouting seeds in different environments to test the effect of different environmental variables on seed germination. Try testing variables like temperature, soil acidity, water content, light or the presence of insects, worms or other plants. You can also cut open seeds to learn about the parts of a seed.